Configure Your Application
How to set up your Deepchecks application - interaction types, properties, auto-annotation, sampling, cost, document classification, and more.
After creating an application and connecting your data, Deepchecks gives you control over how it evaluates your interactions. This guide covers the main configuration options - all accessible from Manage Applications → Edit Application or the Interaction Types screen.
Interaction Types
Every interaction logged to Deepchecks is assigned an interaction type - Q&A, Agent, Tool, LLM, Retrieval, etc. The interaction type determines which properties apply and how auto-annotation is configured.
By default, Deepchecks infers interaction types automatically from your data structure. You can also create custom interaction types to differentiate sub-components of your pipeline. For example, if you have a "Planning" agent and an "Executing" agent, you can map each to its own type - giving each a separate set of properties and annotation rules.
To manage interaction types: go to Interaction Types in the application screen. From here you can:
- View which interaction types are active
- Map specific span names to a custom interaction type
- Access the auto-annotation editor for each type
- Download or upload the configuration YAML
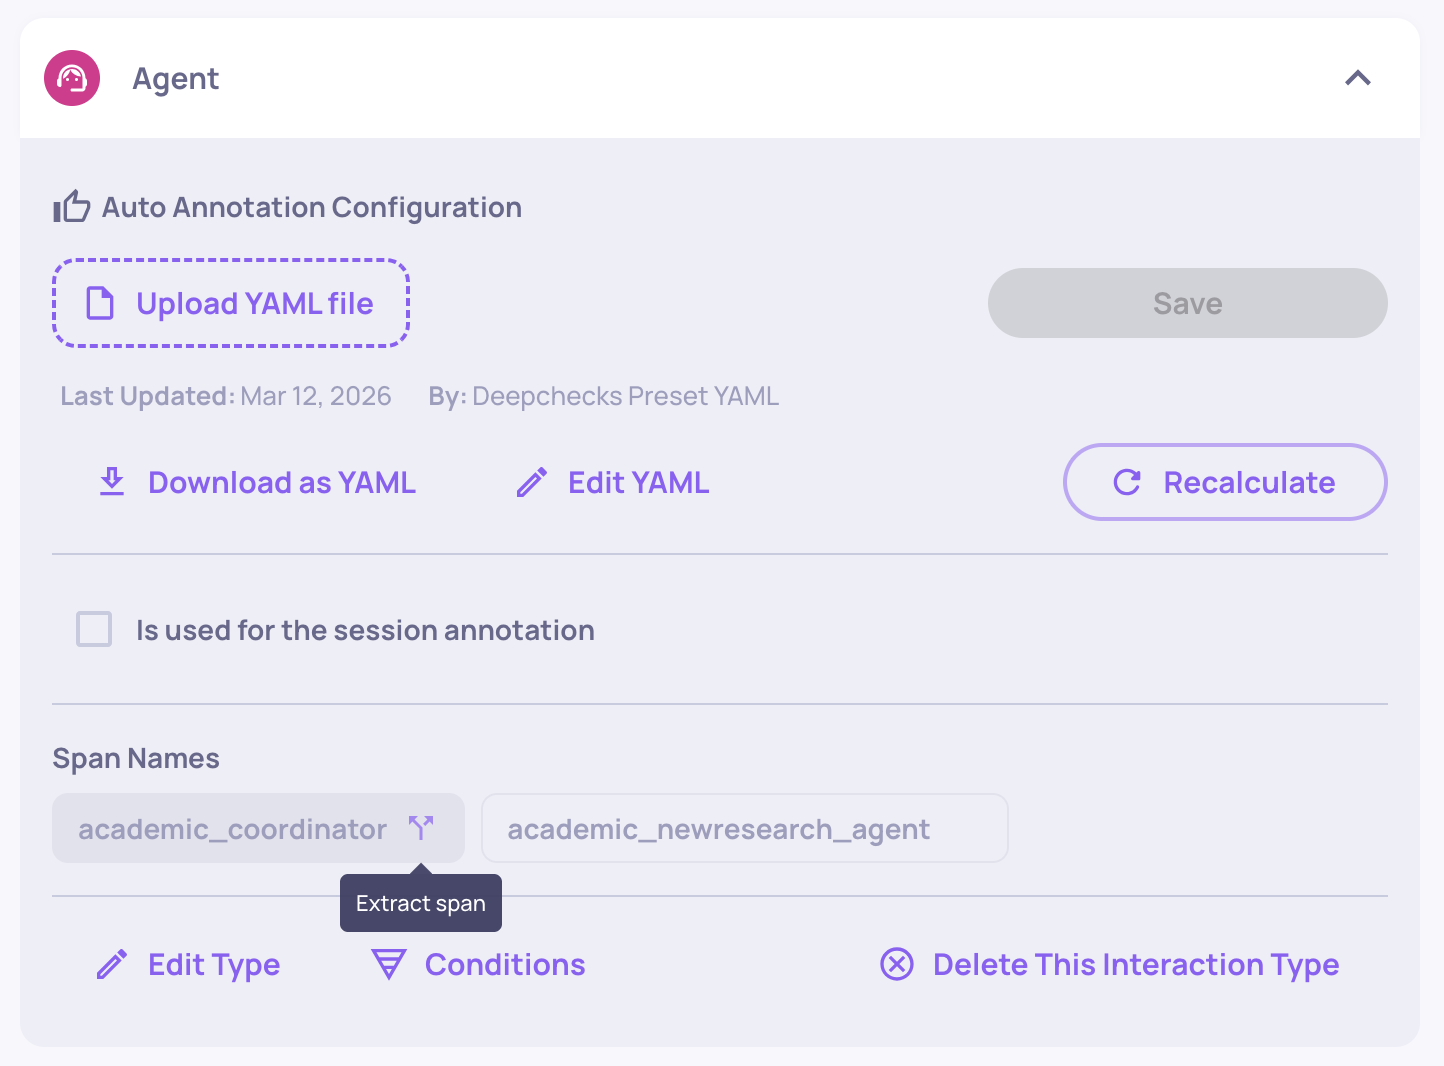
Extracting a span to its own interaction type
When traces are uploaded from an agentic framework, each span is assigned an interaction type based on its span kind - so every Agent span lands under a single "Agent" interaction type, every Tool span under "Tool", and so on. If the spans grouped under the same type need different properties or auto-annotation rules (for example, a Reader agent and a Writer agent that should be judged by different criteria), you can extract a span into its own interaction type.
To extract a span:
- Navigate to the Interaction Types screen.
- Open the interaction type that contains the span.
- Under Span Names, click the extract icon next to the span you want to separate.
- Choose either:
- Create a new interaction type - all properties and auto-annotation configuration are copied from the source type, and all interactions matching that span name are moved to the new type.
- Move the span to an existing interaction type - the interactions are moved into the target type. Properties are matched automatically: matching properties keep their scores, properties that exist only in the target type appear as N/A on moved interactions, and properties that exist only in the source type are removed from them.
This is the core mechanism for evaluating multi-agent workflows where different agent roles have different responsibilities. Once extracted, the new interaction type has its own independent property set and auto-annotation pipeline - you configure each exactly like any other interaction type.
Properties
Properties are the quality metrics Deepchecks calculates on each interaction. You choose which properties are active for each interaction type.
To configure properties: go to Properties in the sidebar, then select an interaction type. From there you can:
- Enable or disable built-in properties
- Add prompt properties - custom LLM-as-a-judge evaluators you define
- Manage user-value properties - numerical or categorical metrics you send with your data
- Pin properties to the Overview dashboard for at-a-glance monitoring
Each interaction type has its own independent property set. Changes take effect on newly evaluated interactions; you can recalculate on past interactions if needed.
→ See Properties Overview for the full catalog.
Auto-Annotation Configuration
Auto-annotation is how Deepchecks labels each interaction as Good, Bad, or Unknown based on property scores and other signals. It is configured per interaction type.
To configure via the UI: Go to Interaction Types, select a type, and click Edit YAML to open the visual pipeline editor. You can add, remove, and reorder blocks - property conditions, similarity matching, children propagation - without editing any YAML.
To configure via YAML: Download the current configuration from the same screen, edit it, and re-upload. After saving, you'll be prompted to recalculate annotations across existing versions so comparisons stay consistent.
→ See Configure Auto Annotation Rules for a full walkthrough.
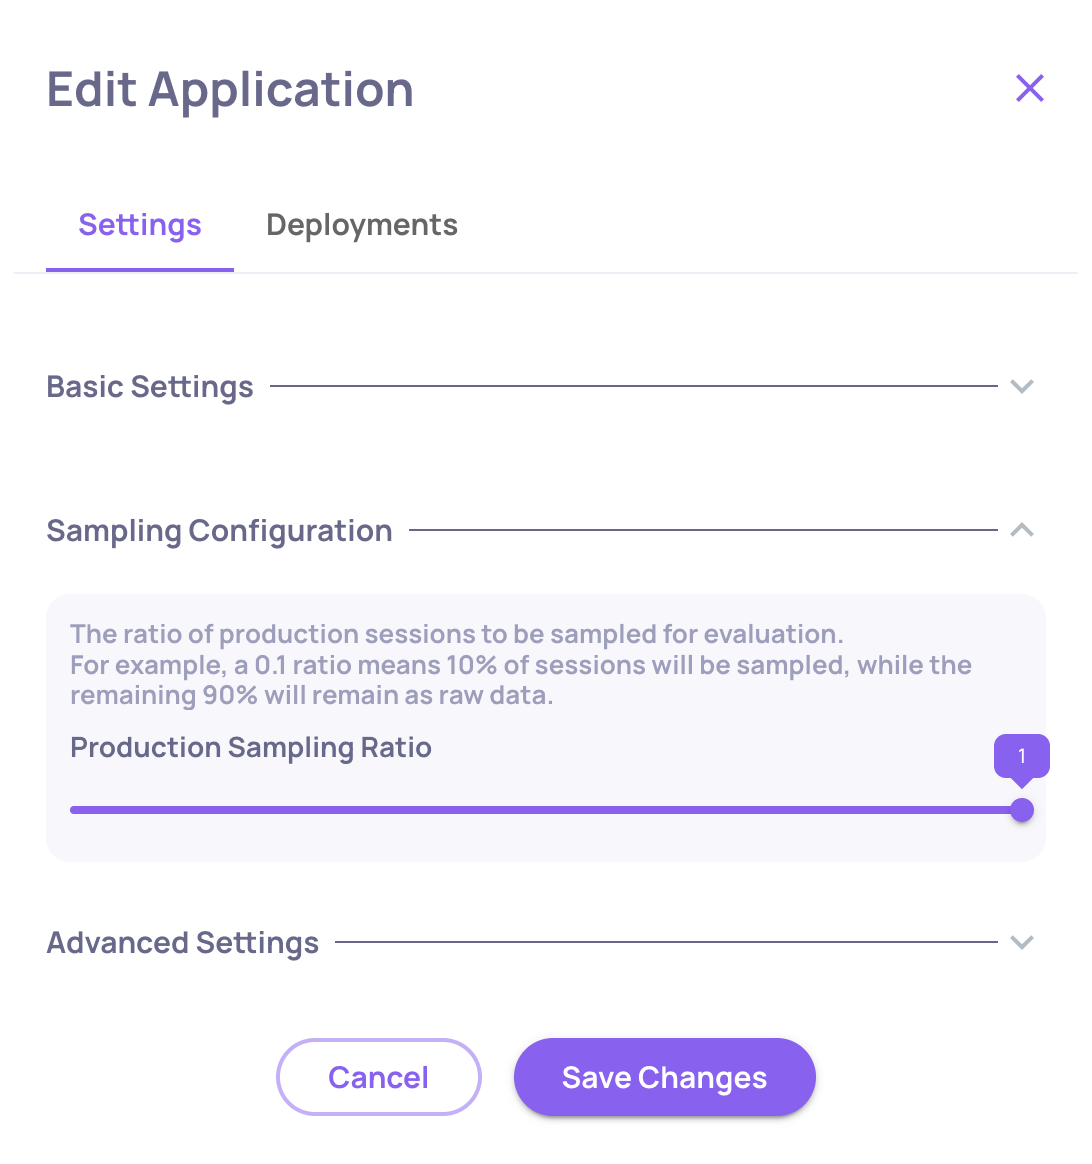
Sampling
Deepchecks evaluates a configurable percentage of incoming interactions rather than all of them. This controls evaluation cost, especially in production.
To set sampling: Edit Application → Sampling Ratio.
- For evaluation environments, use
1.0(100%) to ensure every test case is scored - For production environments,
0.1-0.3is typical depending on volume
Interactions not selected for evaluation are stored as raw data and can be individually sent for evaluation later.
→ See Optimize Costs & Usage for a full breakdown of how DPUs are consumed.
Document Classification (RAG)
For RAG pipelines, Deepchecks can classify each retrieved document as Platinum, Gold, or Irrelevant - enabling a set of advanced retrieval properties (nDCG, Retrieval Coverage, Retrieval Utilization, Retrieval Precision, etc.).
Document classification is disabled by default. To enable it: Edit Application → enable Document Classification.
Once enabled, the classification runs automatically alongside property evaluation. Note that classification uses LLM calls and counts toward your DPU usage.
→ See RAG Use-Case Properties for a description of each classification-dependent property.
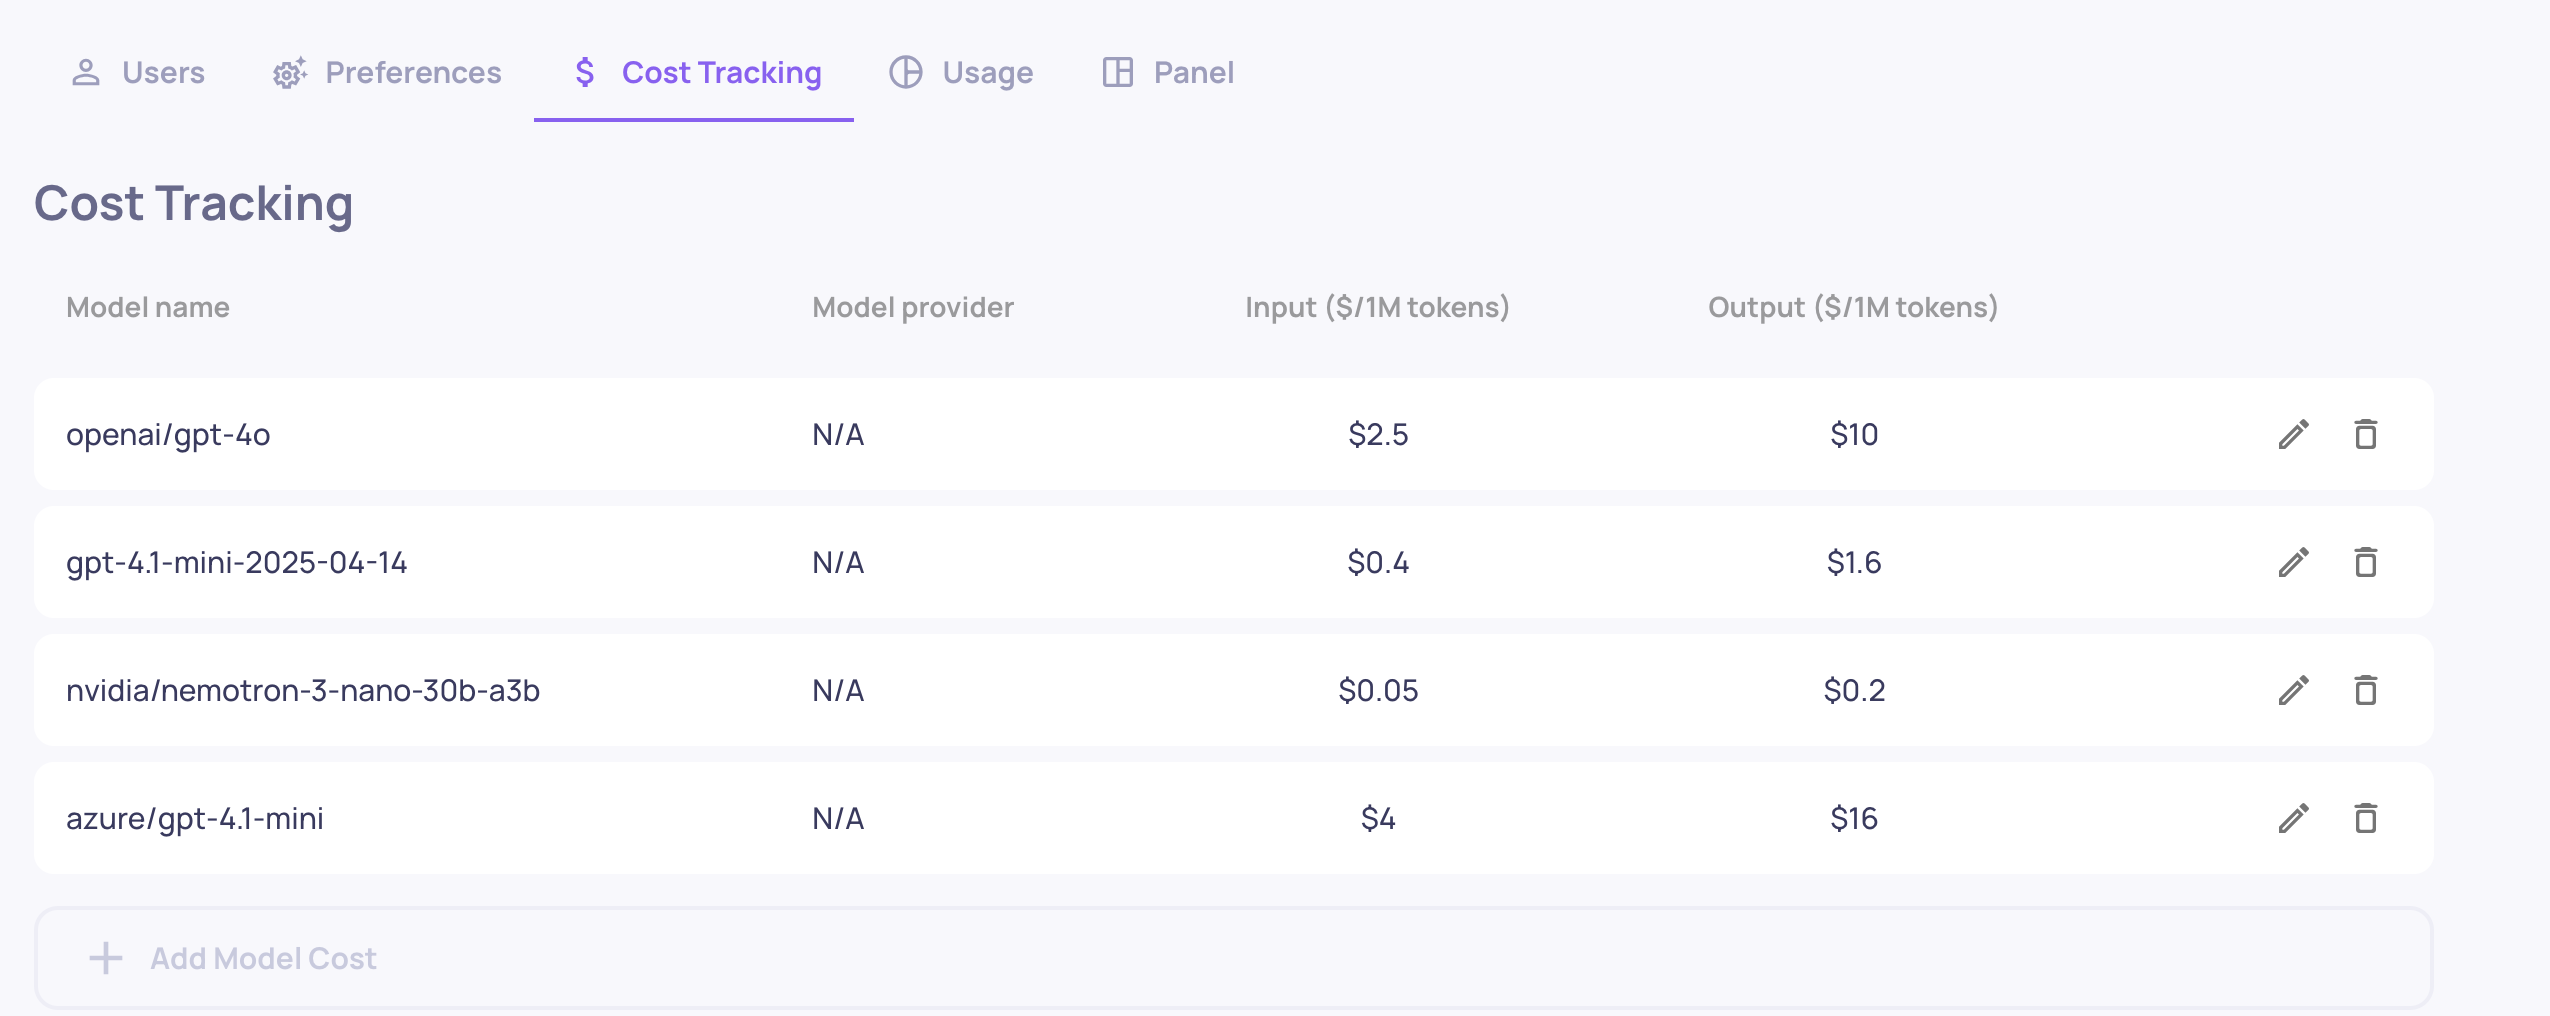
Cost Tracking
Deepchecks automatically calculates the cost of LLM calls based on token usage and your configured model pricing. To enable accurate cost tracking:
- Go to Edit Application → Model Pricing
- Map each model your application uses to a cost-per-token rate
Once configured, cost is shown per interaction, per session, and aggregated per version - making it easy to compare the cost trade-offs between versions.
→ See Cost Tracking for details.
Language Translation
Deepchecks evaluates data in any language, but not all properties handle non-English content the same way.
- LLM-based properties (built-in LLM properties, prompt properties, document classification, topic classification, session-level properties) work natively with all languages. No translation is needed - the underlying LLM understands the content directly.
- GPU-based built-in properties (e.g., Reading Ease, Fluency, Formality, Sentiment, Invalid Links, Information Density, PII Risk) are trained on English data only. To score non-English content with these properties, Deepchecks can automatically translate the interaction to English before evaluation.
When translation is enabled, Deepchecks runs a language detection step on every interaction and translates non-English content to English before the GPU-based properties run. This adds token usage, so if your data is already in English you should disable translation to save DPUs. If your data is non-English and you only rely on LLM-based properties, you can also disable translation with no impact on evaluation.
To configure: Workspace Settings → Preferences → Application Settings → Translation_Detection (true/false).
→ See Optimize Costs & Usage for the DPU cost of language detection and translation.