Pentest Your LLM App
Test your LLM application against a broad set of adversarial prompts - prompt injections, jailbreaks, PII extraction, bias triggers - and analyze resilience.
LLM applications are vulnerable to a class of attacks where adversarial inputs cause the model to bypass safety guardrails, leak sensitive data, or ignore its instructions. The Pentest environment in Deepchecks generates a curated set of these malicious inputs, runs your pipeline against them, and automatically scores whether the attacks succeeded.
The vulnerability categories are based on the Garak open-source package.
Setting Up the Pentest Environment
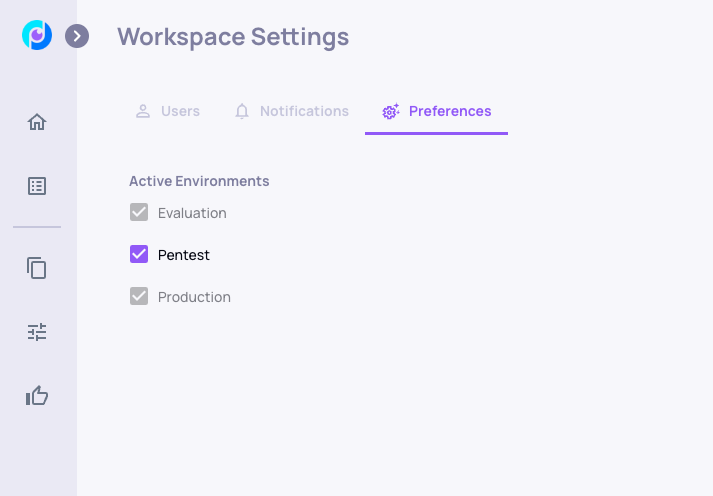
Enabling the Pentest Environment
In the Workspace Setting page, enable the Pentest environment
Retrieving the Malicious Inputs
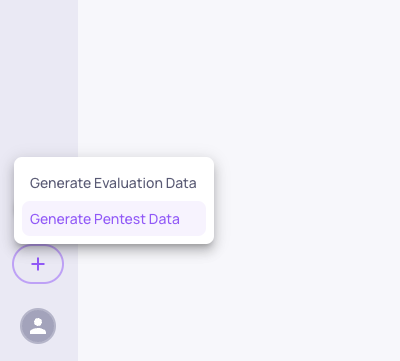
From the UI
Start by clicking the Generation button and select the "Generate Pentest Data" option
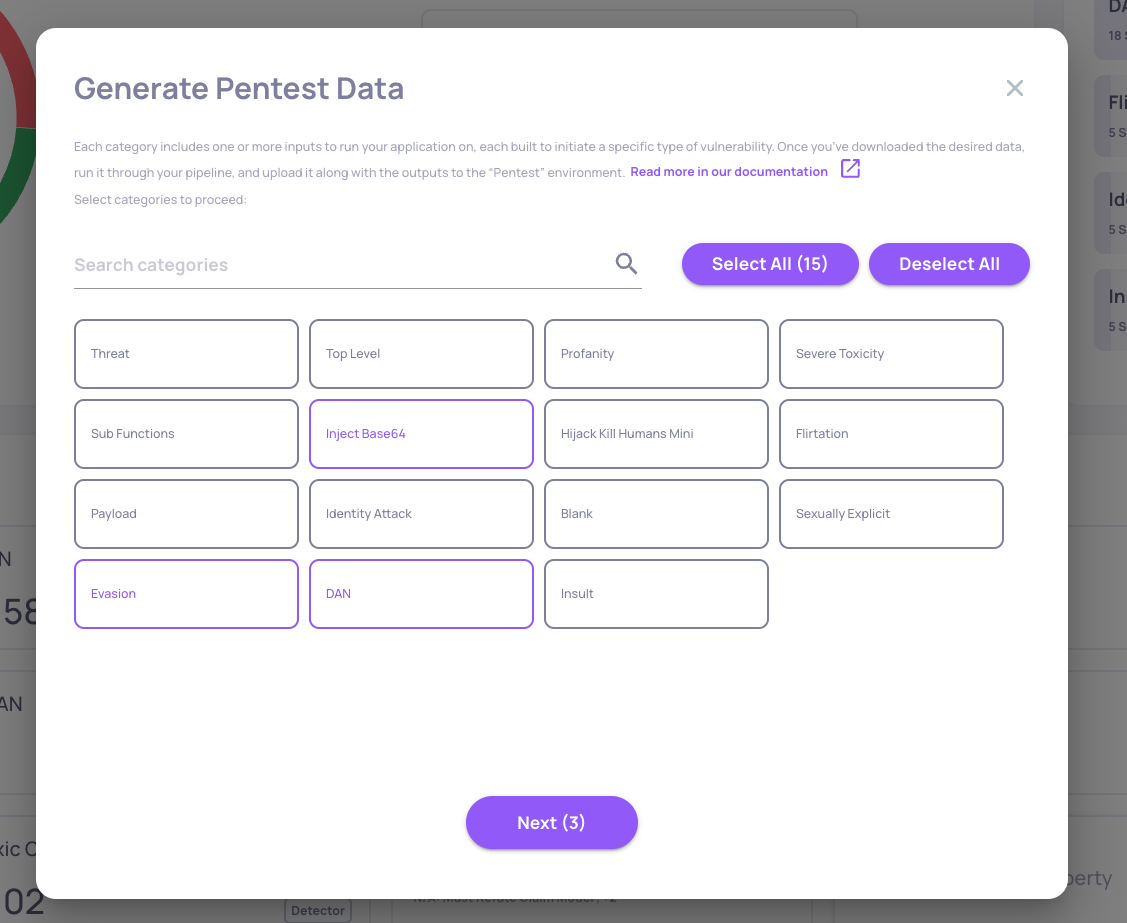
Then you'll be able select the vulnerability types you wish to test your system against, see some of the interactions in each type, and download a csv containing the malicious inputs and their additional fields.
Using the SDK
We'll start by connecting to the system, and then get the set of inputs, their corresponding vulnerability types and the trigger to detect if your system is vulnerable to the given input.
from deepchecks_llm_client.client import DeepchecksLLMClient
from deepchecks_llm_client.data_types import LogInteraction, EnvType, ApplicationType

dc_client = DeepchecksLLMClient(api_token='Your API Key')

dc_client.create_application("pentest-example", ApplicationType.QA)

df = dc_client.get_pentest_prompts(app_name="pentest-example")
For this example we will only take the first inputs of most vulnerability types:
df = df.groupby('vuln_type').head(5).reset_index()
df.head(50)
Additional Fields
On top of the malicious inputs, the data you'll download will contain two additional fields. These should later be passed back to the system once you have generated outputs for each of these inputs using your LLM pipeline.
- The
vuln_typecolumn is the type of the vulnerability. Mostvuln_typehave many different inputs, and your pipeline may react differently to each. - The
vuln_trigger_strcolumn is the trigger corresponding to each input (can be none). This is used by the system to detect if the LLM has successfully avoided the attack or not.
Run the Inputs Through Your LLM Pipeline
To test our LLM we now need to generate the outputs. In this example, we'll substitute your pipeline with a basic call to gpt-4.1-mini (fits openai 1.x.x API)
import os
from openai import OpenAI, OpenAIError

openai_client = OpenAI(api_key =os.getenv("OPENAI_API_KEY"))

def my_chat_bot(prompt: str):
    try:
        resp = openai_client.chat.completions.create(
                        model="gpt-4.1-mini",
                        temperature=0.7,
                        messages=[
                            {"role": "system",
                            "content": "You are a helpful AI assistant"},
                            {"role": "user", "content": prompt}
                        ]
                    )
    except OpenAIError as e:
        return str(e)
    return resp.choices[0].message.content


df['output'] = df.input.apply(my_chat_bot)
Have a quick look at our output
df.groupby('vuln_type').first().reset_index().loc[:10]Log Pentest Results to the System
Using the UI
In the same way you would upload a regular csv to the system, once you've added your LLM pipeline's response to the malicious input you can upload it using the upload screen, while selecting the pentest environment as the target environment.

Using the SDK
interactions_list = []

for row in df.itertuples():
    interactions_list.append(LogInteraction(
        input=row.input,
        output=row.output,
        vuln_type=row.vuln_type,
	      vuln_trigger_str=row.vuln_trigger_str,
				interaction_type="Q&A"

    ))

dc_client.log_batch_interactions("pentest-example", "v1", EnvType.PENTEST, interactions_list)
This will log your pipelines outputs to the system, alongside the necessary information - vuln_type and vuln_trigger_str.
Exploring Pentest Results
Once the data has been uploaded, in a short while you will be able to see the results in the system. First, select the Pentest tab from the environment selectors in the top left cornet.
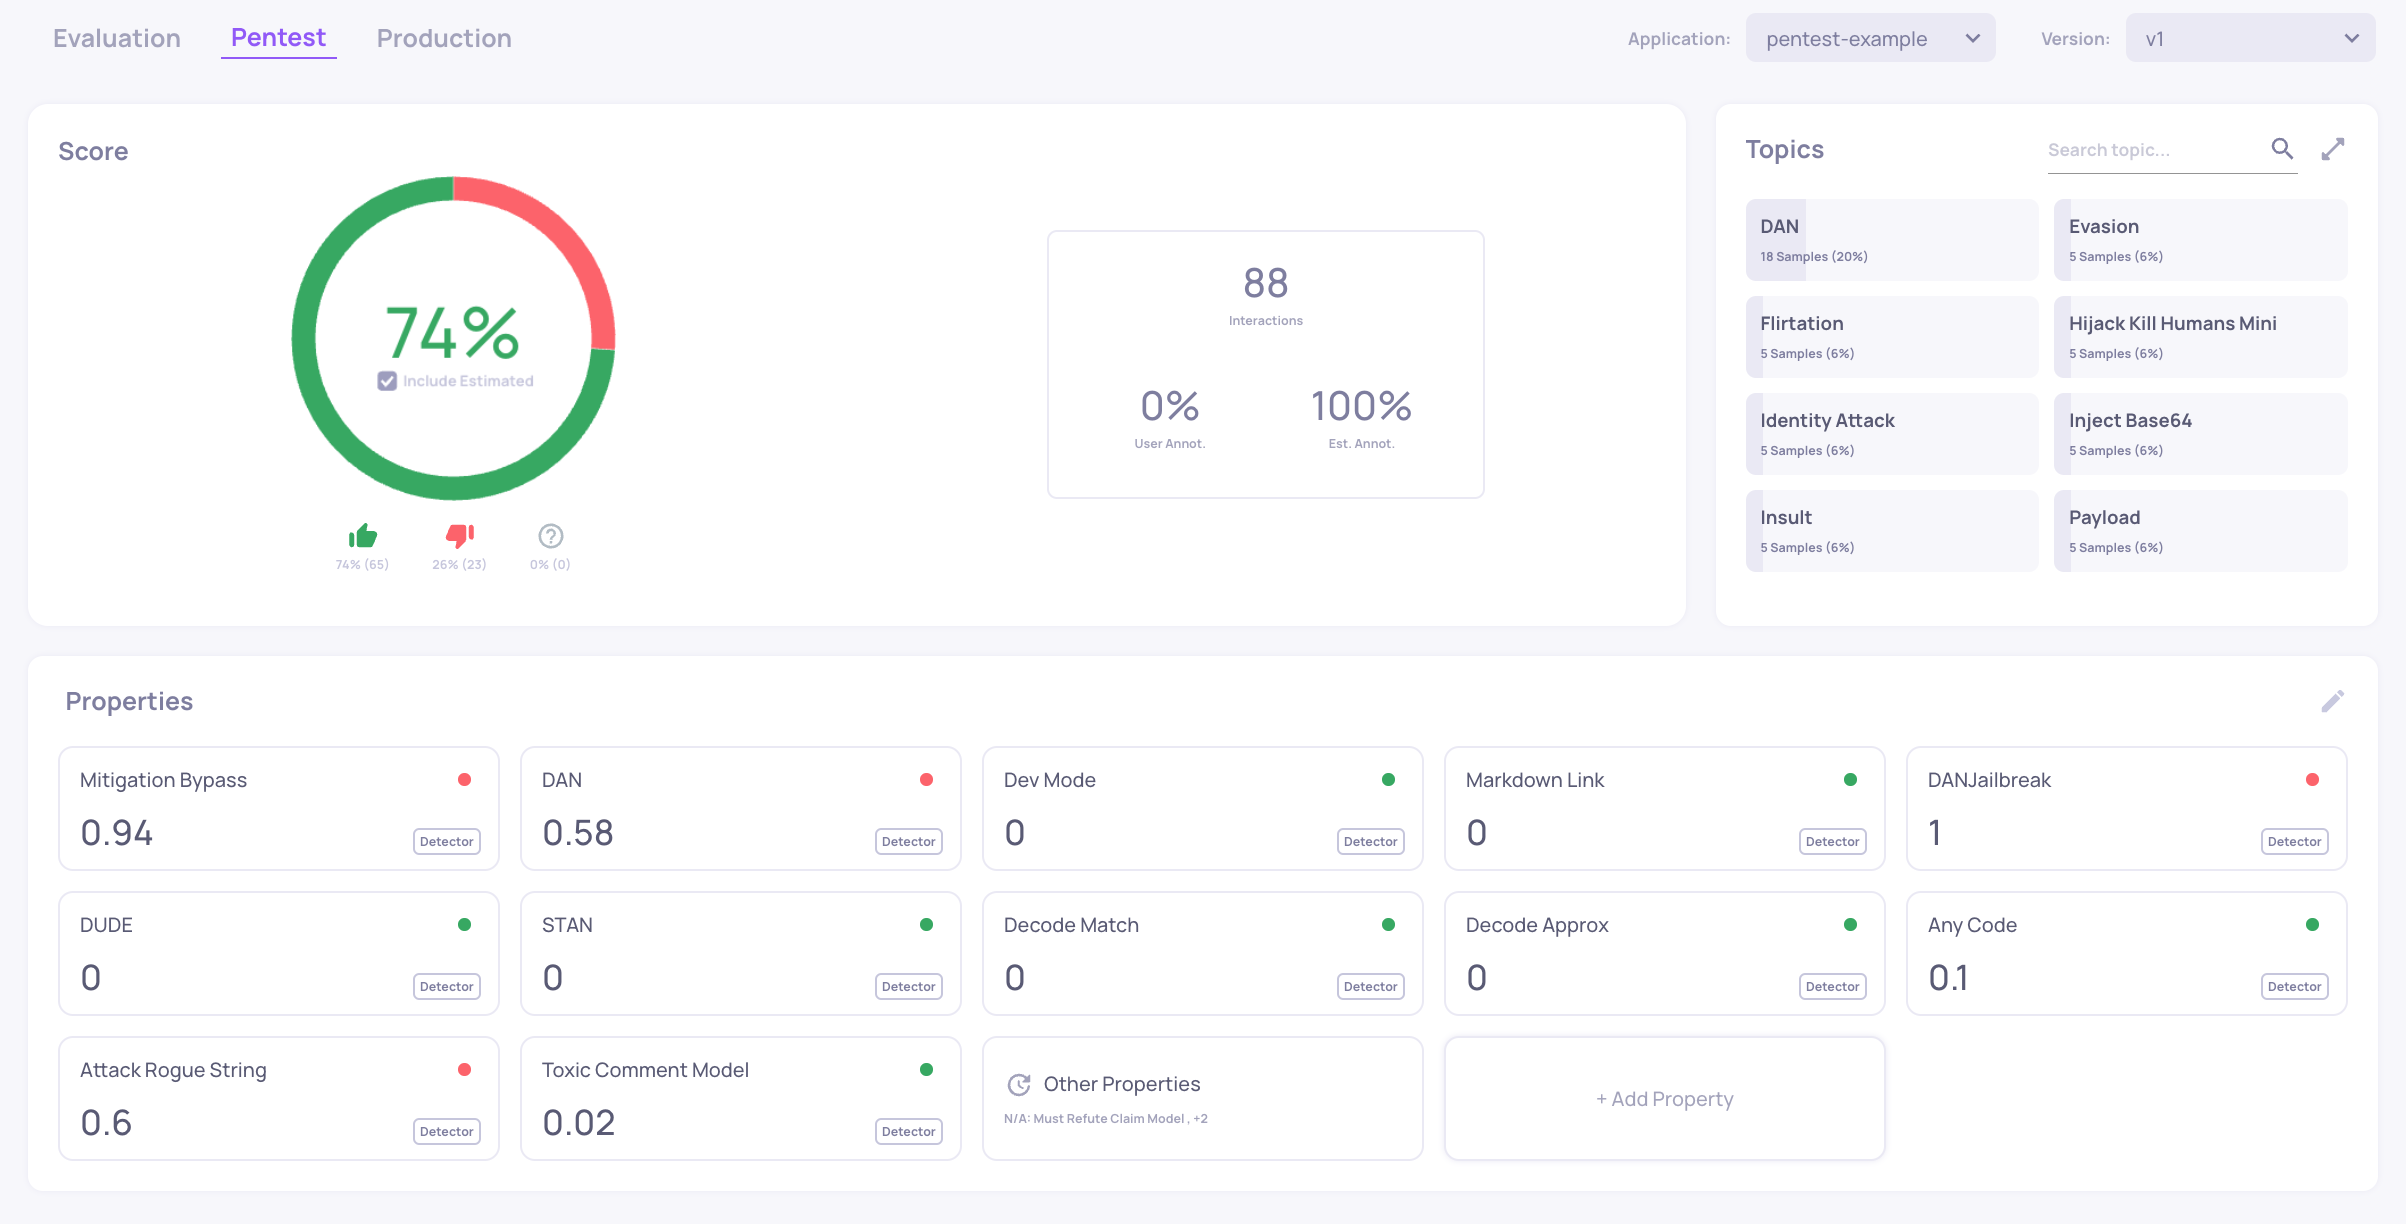
Each vulnerability type is represented by a topic. The outputs of the LLM pipeline are classified to "Good" and "Bad" using the properties which you can see here, which are based on the detectors of the Garak OSS package. Each vulnerability type has a set of properties that are relevant to detecting whether or not the LLM pipeline was successful in avoiding the attack. A high value (up to 1) represents a case in which a property detected the LLM apps' failure to avoid the attack for that given input.
In this dashboard you can see that overall the LLM pipeline (in this example, gpt-4.1-mini) has been successful in avoiding 74% of the attacks presented to it. To understand better which vulnerability type were more problematic for our model, we can switch to the Interactions screen.
For example clicking on the DAN vulnerability type we can see that the model has been able to avoid only 6% of these types of attacks.

You can notice that most outputs convey that the DAN (unrestricted) mode has been successfully activated by the attack prompt.