UI Quickstart
Quickly onboard to the system using only a csv file
This quickstart is the place to start if you are new to Deepchecks LLM Evaluation. We'll walk you briefly through uploading data to the system and using the system to automatically annotate the outputs of your LLM pipeline.
Demo LLM ApplicationWe will be using as an example a simple Q&A Bot, based on the Blendle HR manual. This simple langchain based bot is intended to answer questions about Blendle's HR policy. It receives as input user questions, performs document retrieval to find the HR documents that have the best chance to answer the given question and then feeds them to the LLM (in this case, gpt-3.5-turbo) alongside the user question to generate the final answer.
Uploading Data
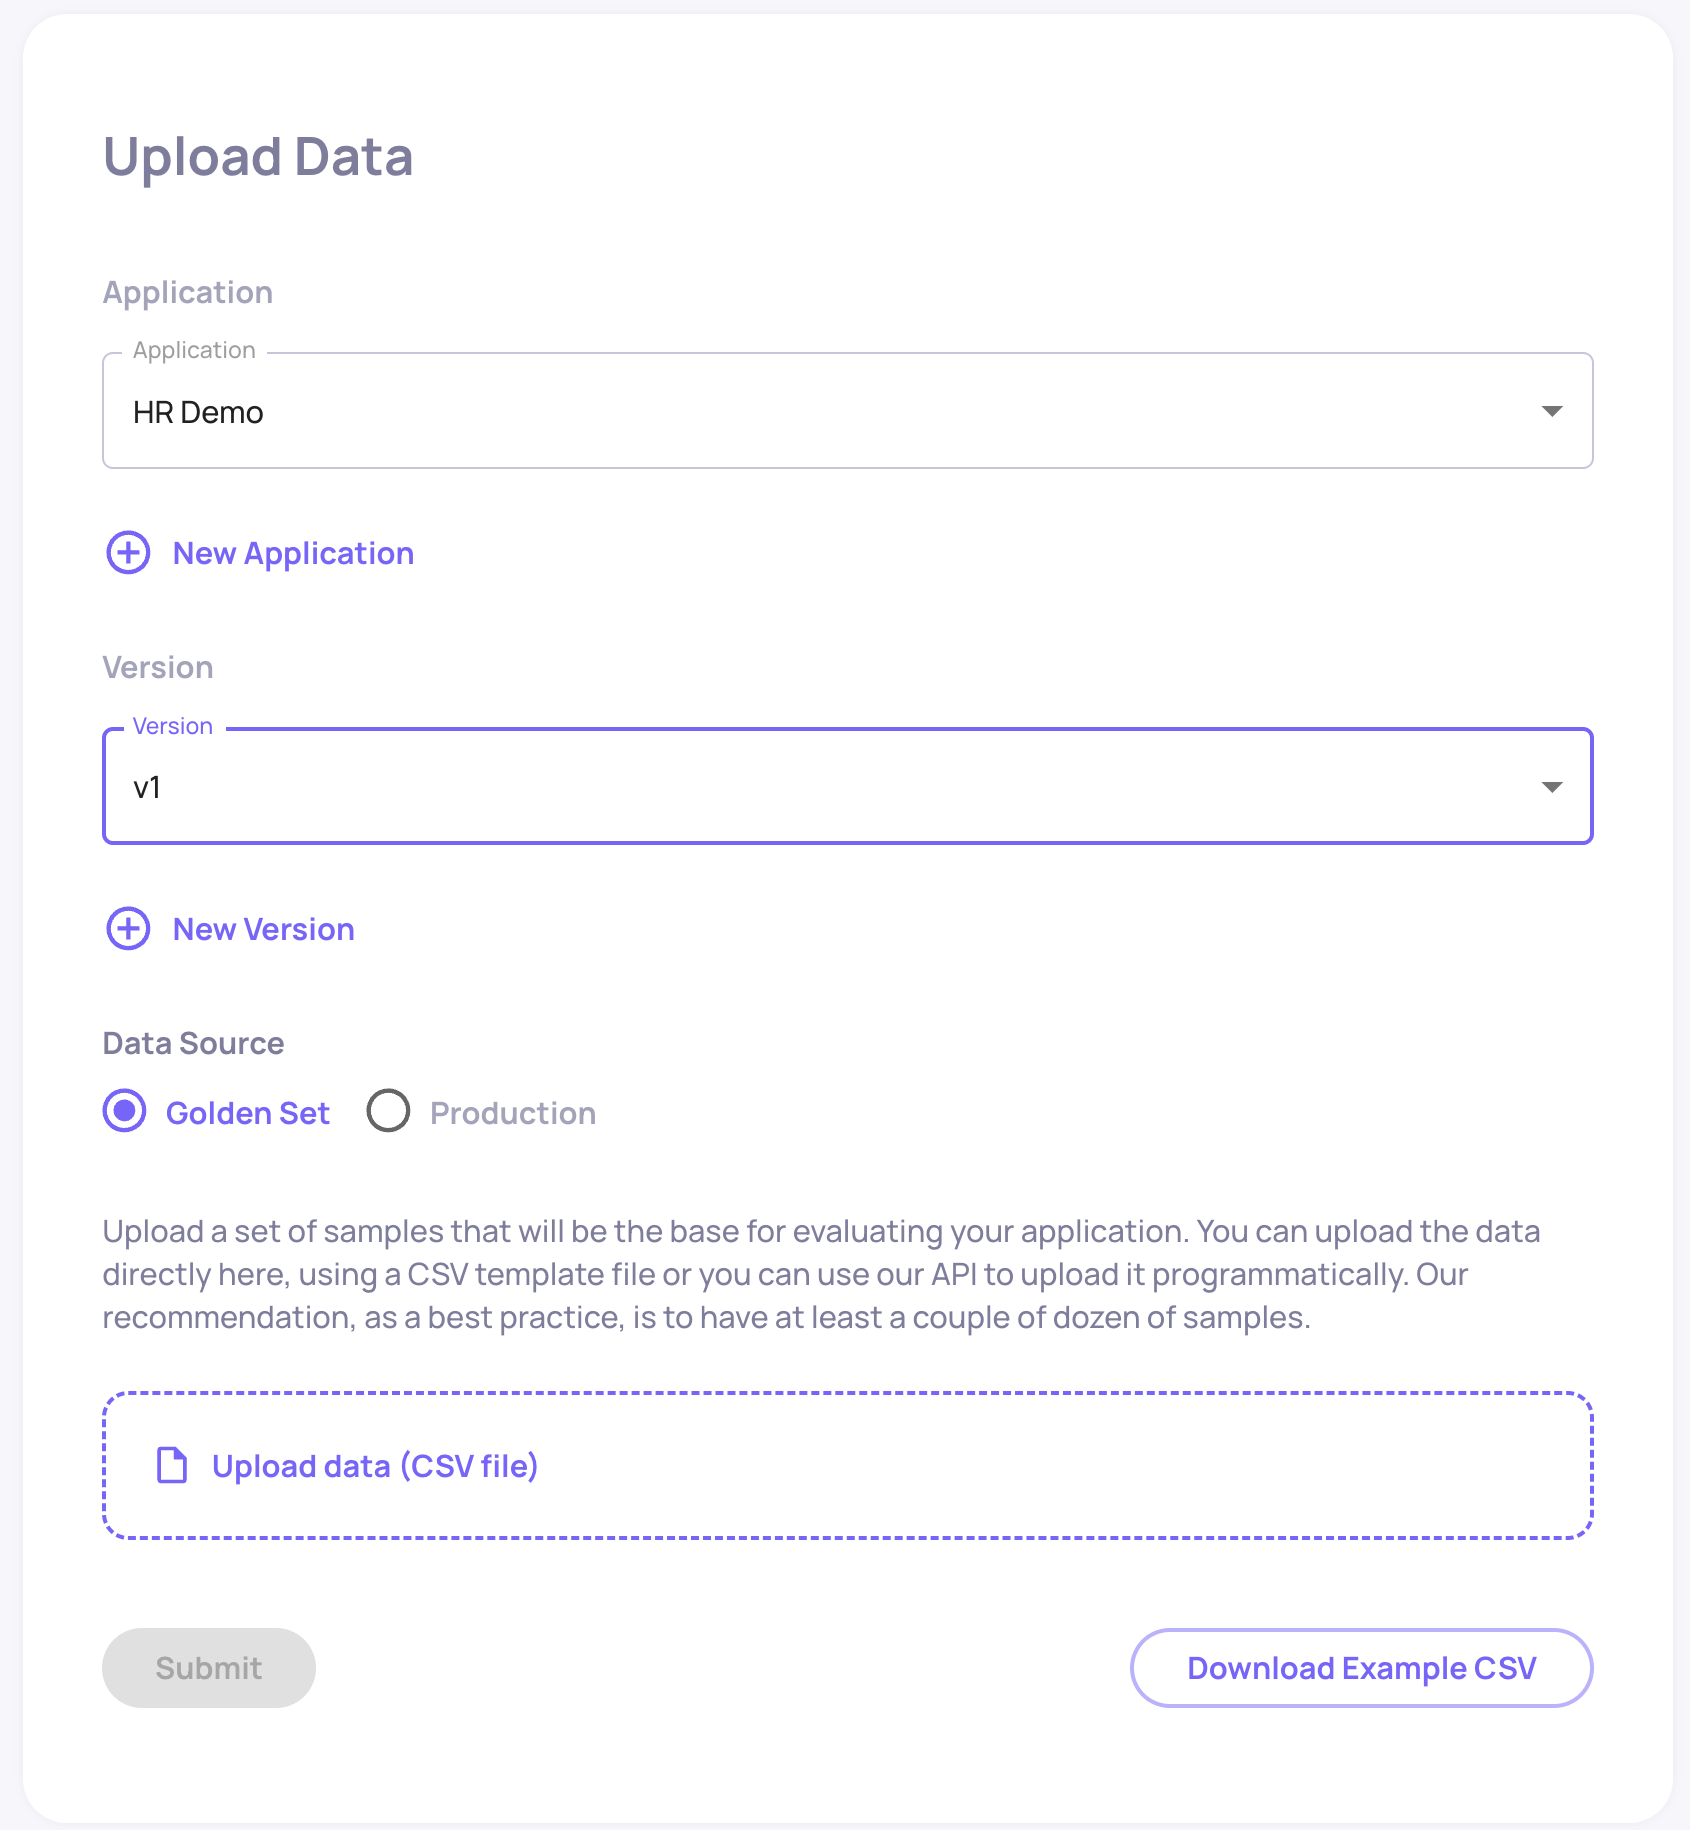
Upon signing into the system, you will either be presented right away with the Upload Data screen, or with the Dashboard (if you have already uploaded interactions previously). In the second case, click the "Upload Data" button in the bottom left side to open the Upload Data screen.

In order to upload interactions, you need to first select or create the Application and Application Version. An Application represents a specific task your LLM pipeline is performing. For example in our case - answering HR-related question of Blendle employees. An Application Version is simply a specific version of that pipeline - for example a certain prompt template fed to gpt-3.5-turbo.

Names selected, you can now upload your data. The data you're uploading should be a csv file reflecting individual interactions with your LLM pipeline. The structure of this csv should be the following:
user_interaction_id | input | information_retrieval | full_prompt | output | annotation |
|---|---|---|---|---|---|
Must be unique within a single version. used for identifying interactions when updating annotations, and identifying the same interaction across different versions | (mandatory) The input to the LLM pipeline | Data retrieved as context for the LLM in this interaction | The full prompt to the LLM used in this interaction | (mandatory) The pipeline output returned to the user | Was the pipeline response good enough? |
You can download the data for the Blendle HR Bot, GPT-3.5-prompt-1 version here. This dataset contains 97 interactions with the bot, alongside human annotations for some of the interactions.
Golden Set and ProductionYou might notice we have the "Data Source" toggle in the upload page, enabling us to upload data either to the Golden Set or to the Production environments.
- The Golden Set are the interactions used by you to regularly evaluate your LLM pipeline and to compare its performance between different versions. For that reason, the user_input field for the golden set interactions will often be _identical_ between different versions, to enable "apples to apples" comparison between the two versions. The golden set will usually contain a relatively small but diverse set of sample representative of the interactions you've encountered in production.
- The Production data is the data your LLM pipeline encounters in the production environment. Logging production data to Deepchecks LLM Evaluation serves to log the user inputs and outputs your model is generating in production, and to automatically get an evaluation for these interactions to get a sense of how your pipeline is fairing in production.
Dashboard and Properties
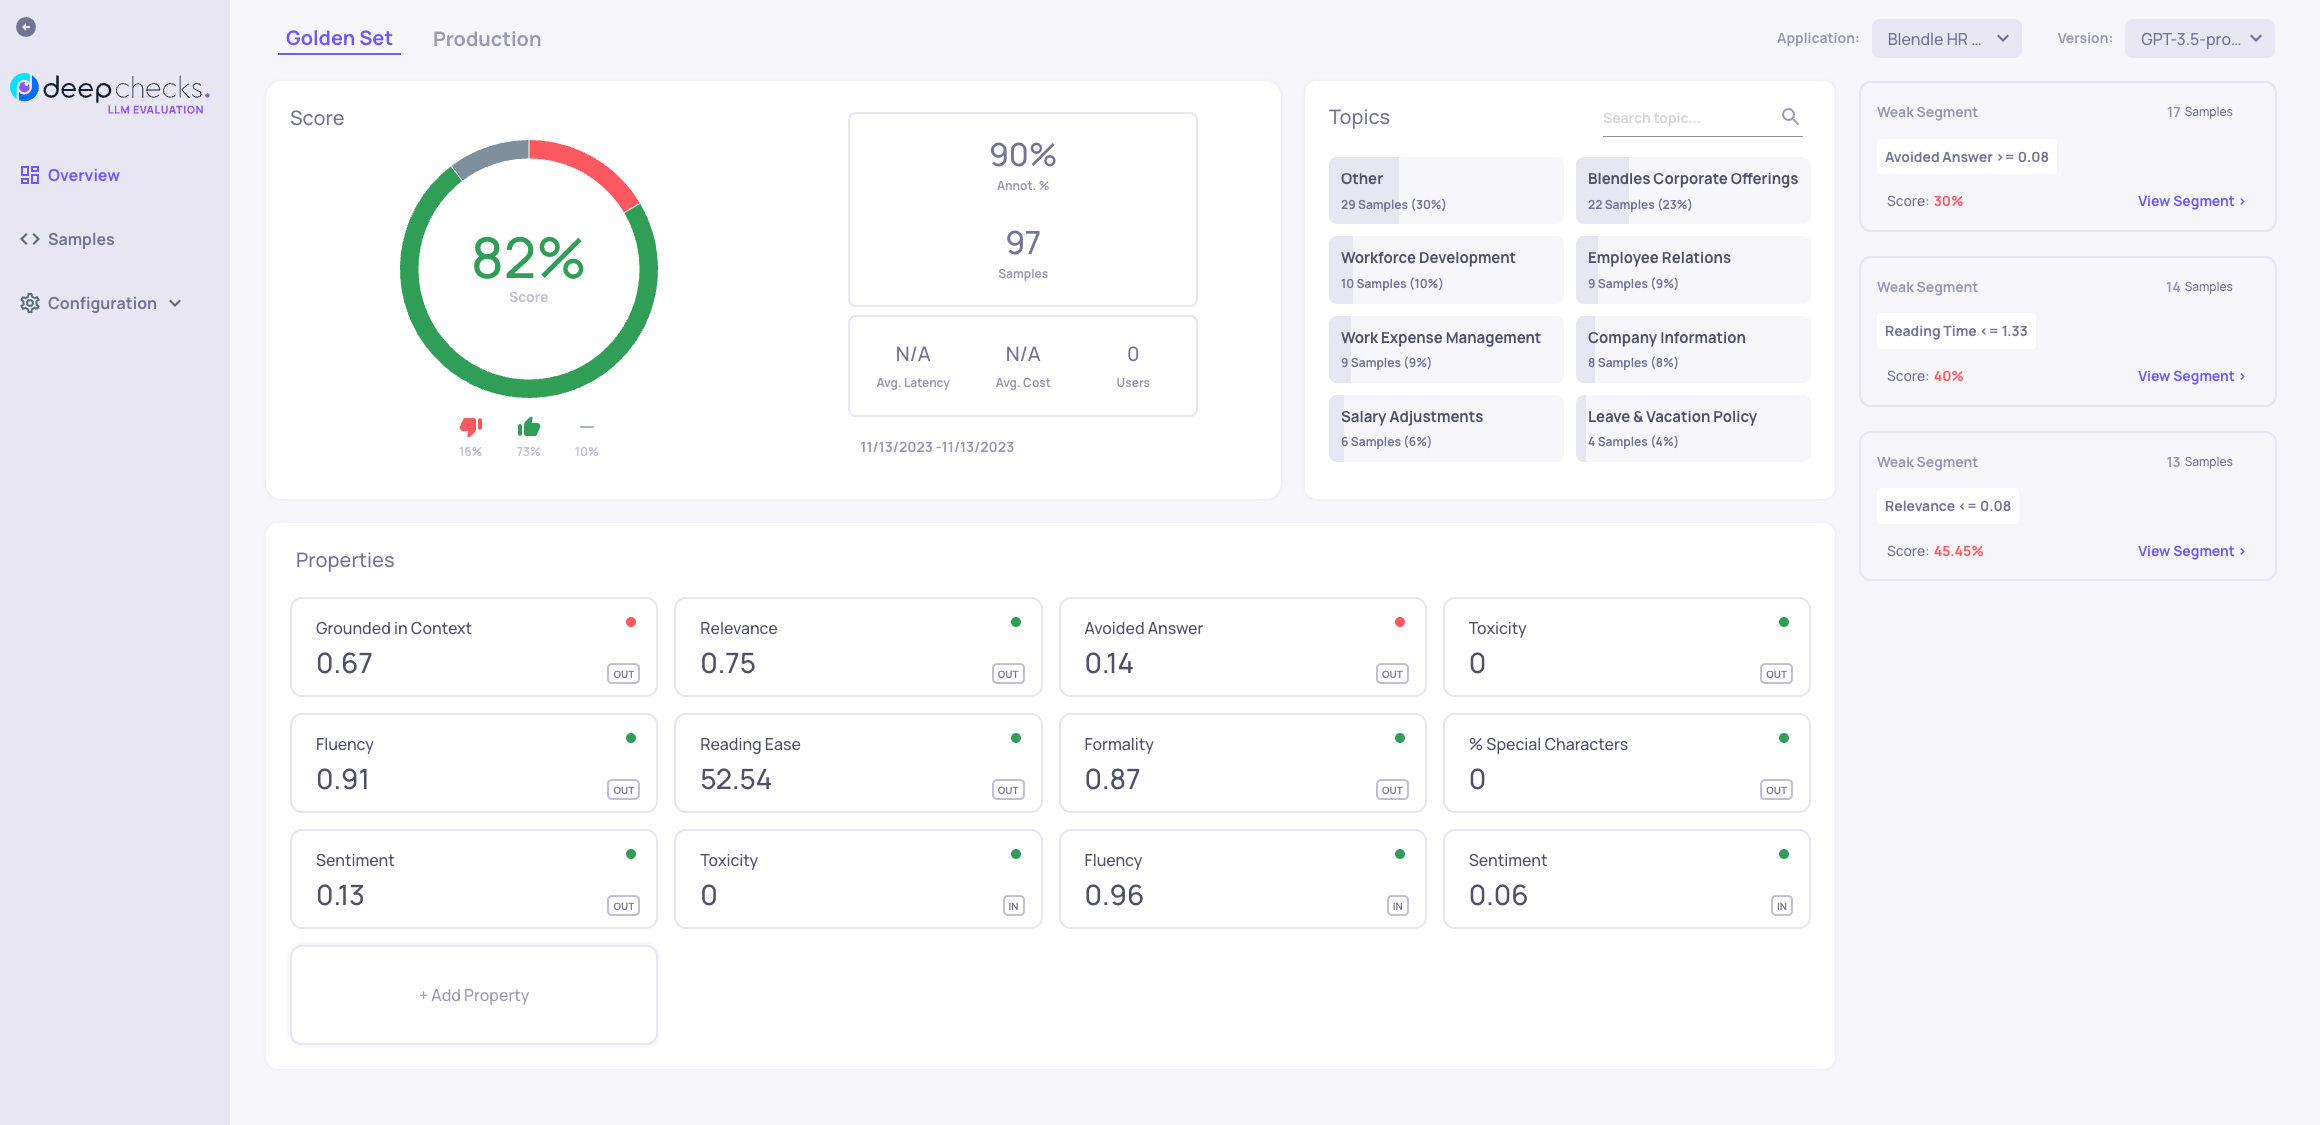
Once the data has been uploaded (and perhaps waiting a short while for the properties to compute) you are directed to the Dashboard. The dashboard serves to give you a high level status of your system. The Score section lets you see what percent of interactions are annotated, and what percent out of the annotated interactions represent good interactions.

Below it is the Properties section. Properties are characteristics of the interaction user input or model output that are calculated for each interaction. In this section, the average value of these properties is presented, and anomalous values are flagged. For example, in the image above we can see that 14% percent of the model outputs were detected as "Avoided Answers", meaning that the model avoided answering the user question for some reason. You can read more about the different kinds of properties here.
Data Page
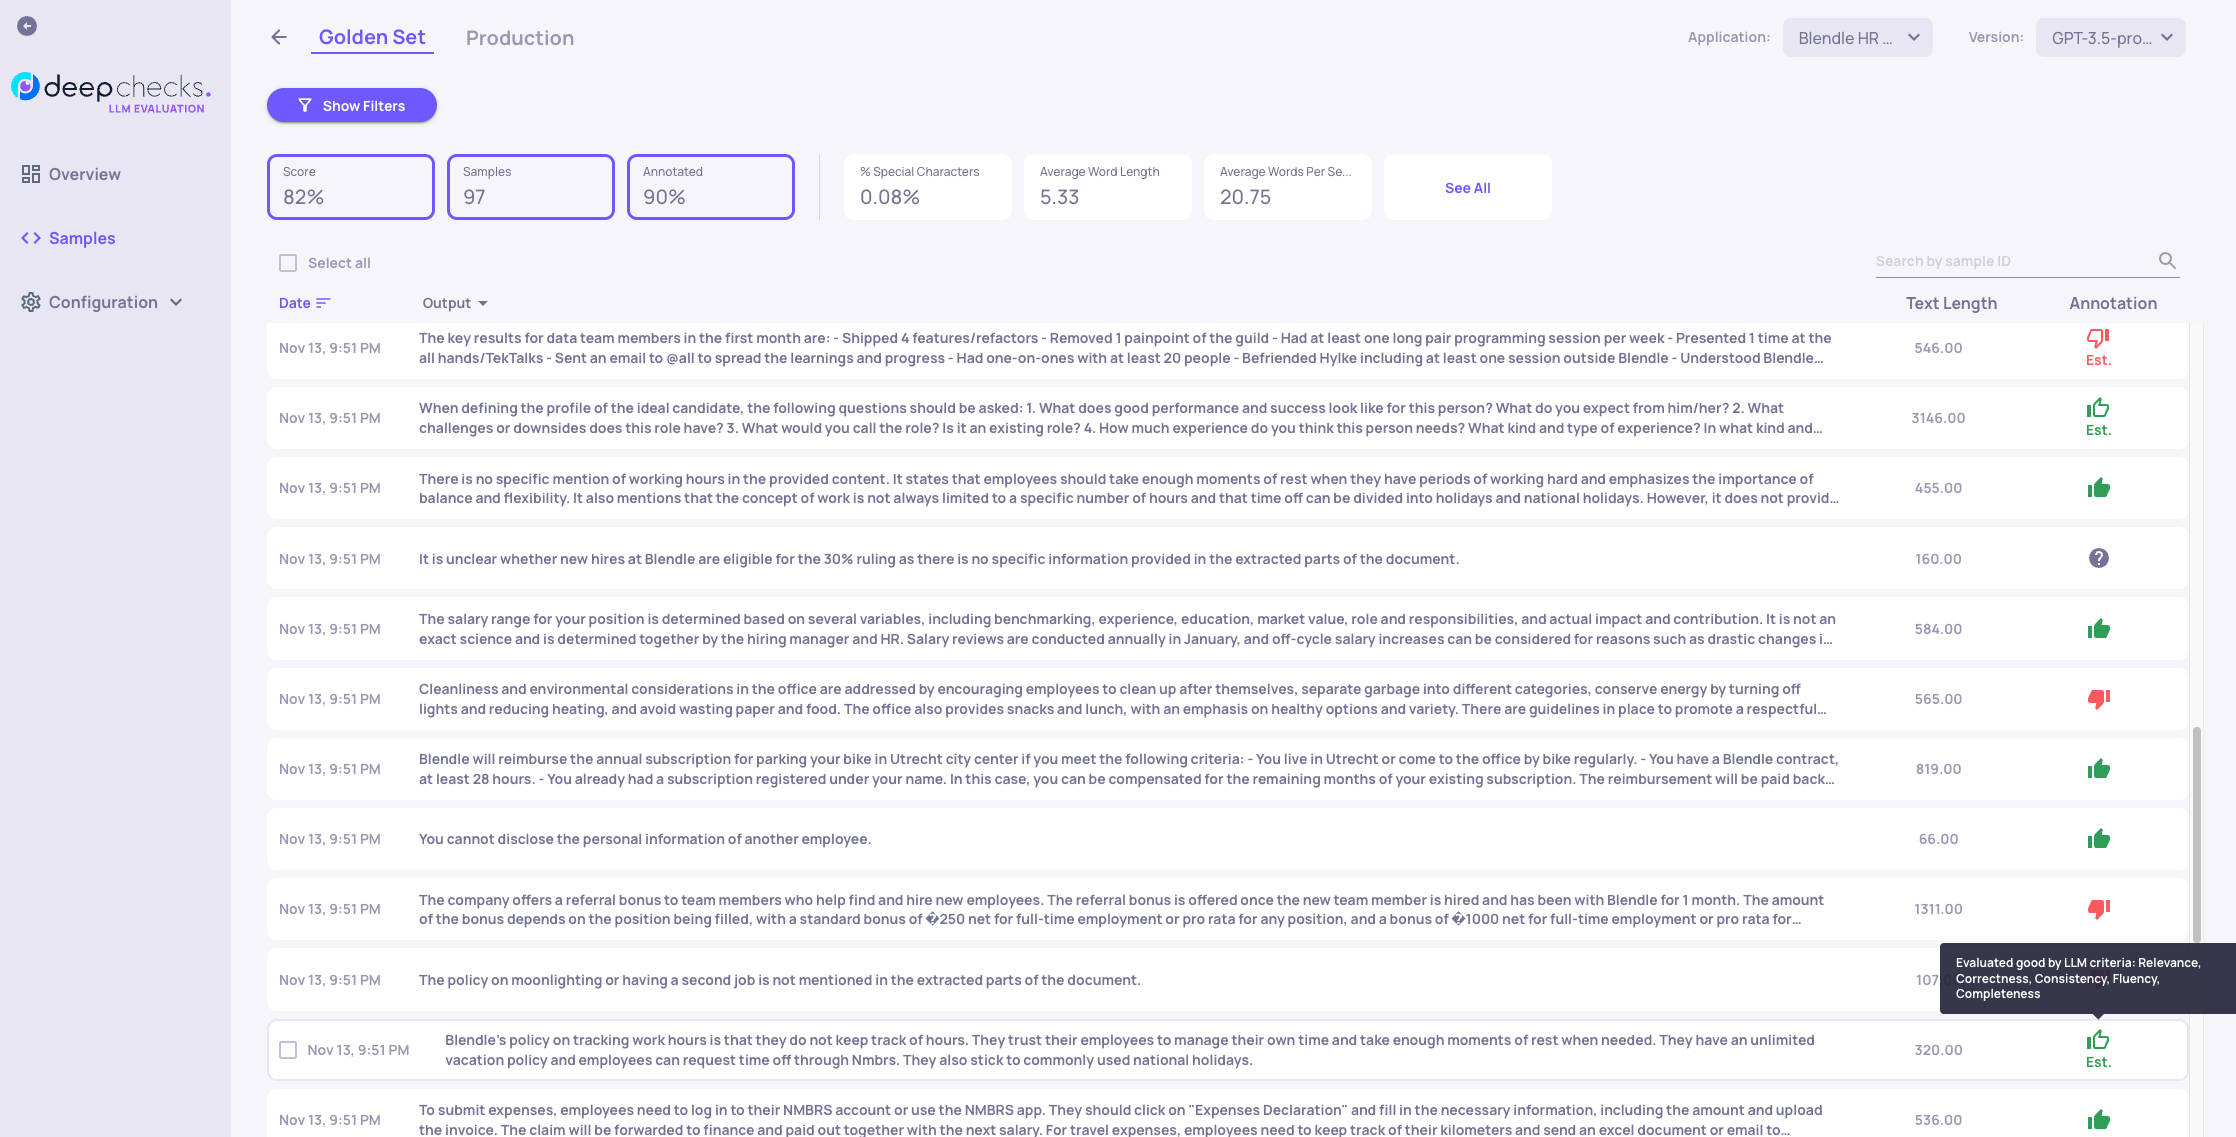
The samples page is the place to dive deeper into the individual interactions. You can use the filters (both on topics, annotations and properties) to slice and dice the dataset and look at the interactions relevant for you, or click on the individual interactions to inspect their components (user input, full prompt and so on) and most importantly - to view and to modify the interaction's annotations.

Estimated Annotations
While the full colored annotations are annotations provided by you (in the "annotations" column of the csv), estimated annotations (marked by having only colored outlines) are annotations estimated by the system. These estimations can be created by one of the following rules:
- Similarity - the system looks for interactions that have the same user_input, and similar outputs. If such a pair is found, and one of the interactions have human annotations, this annotation will be copied to the similar sample. This is especially useful for evaluating new pipeline versions on the same golden set.
- Property - Some properties can help us annotate our interactions. For example, if a sample has a low "Grounded in Context" score it means that the model answer is not really based on the information retrieved, and is very likely a hallucination. In this case, the system will automatically estimate this sample as "Bad". You can learn more about the full range of properties that can be used to create estimated annotations in the properties guide
This flow serves to annotate all previously un-annotated interactions uploaded to the system, and can dramatically accelerate the process of evaluation new versions. Rather then manually annotating the interactions in each new versions, these rules can help get a good idea of how well the version is performing, and comparing that performance to previous versions.
Customizing the Estimated Annotation RulesAll aspects of how and when these rules apply to incoming interactions can be customized by modifying the Auto Annotation YAML file, accessible under the Configuration menu in the left side-bar. Modifying this YAML, you can change the order of the steps, add new steps and change the thresholds.
You can add new custom and LLM properties in the Custom Properties screen.
Updated about 1 month ago